While the latest generation of AI image models, particularly tools like GPT Image 1.5, have unlocked unprecedented capabilities for visual creation, a significant gap exists between their potential and how most people use them. Many users approach these powerful tools with simplistic commands, resulting in generic or uninspired outputs. The key to moving beyond basic pictures and into the realm of professional-grade photography, compelling artwork, and effective design lies not in the tool itself, but in the precision of your instruction. Creating stunning, consistent results every single time is not a matter of luck; it is a matter of formula. By understanding the core components of a powerful prompt, you can unlock the full potential of these models and direct them to generate visuals that are indistinguishable from reality.
Introduction to GPT Image 1.5 and Common Pitfalls
The new generation of AI image generators represents a substantial leap forward in speed, simplicity, and capability. The user interface is often streamlined: a simple prompt box, a generate button, and a result delivered in seconds. Previous generations could be frustrating due to long wait times, but current models have dramatically reduced generation speed, often producing a high-quality image in under 15 seconds. This accessibility, however, conceals a common pitfall. Speed and a clean interface are meaningless without the knowledge of how to craft an effective prompt.
The most frequent mistake is vagueness. A user might type “cool logo” and wonder why the output is generic clip art, or “portrait of a woman” and receive a flat, lifeless image. The AI is not a mind reader; it is a sophisticated pattern-matching system trained on vast datasets of images and their corresponding text descriptions. When you provide a vague prompt, you force the model to guess your intent, pulling from the most common and often least interesting interpretations. It defaults to an average, which is rarely what you need for professional work. To get exceptional results, you must eliminate the guesswork and provide the AI with a detailed, unambiguous blueprint of the image you want to create.
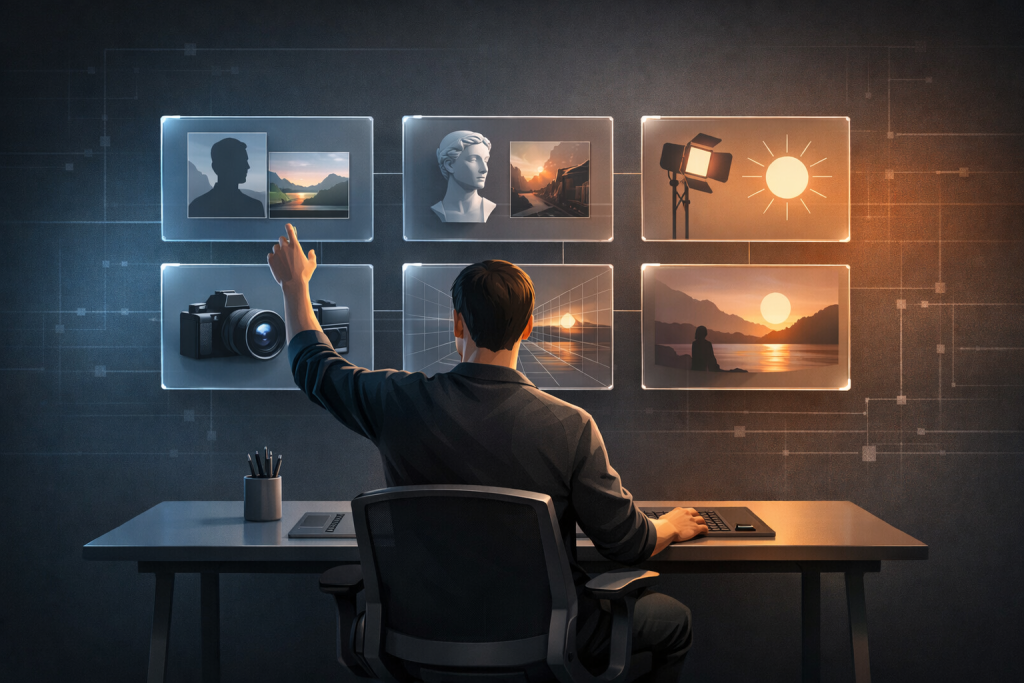
The Six Essential Components of a Powerful Prompt
Through extensive testing and analysis, a clear pattern emerges among prompts that produce consistently superior results. Every great prompt is built upon six essential components. Missing even one of these can lead to a muddy, generic, or flawed image. Conversely, when you systematically address all six, you give the AI model the precise information it needs to render your vision with accuracy and artistry.
1. Subject: This is the primary focus of your image. Specificity is paramount. Do not simply say “a man.” Instead, define the subject with detail: “a 35-year-old man with a five o’clock shadow.” Don’t say “a product”; say “a matte black wireless mechanical keyboard.” The more detailed your subject description, the more accurate the initial rendering will be.
2. Action: What is the subject doing? Action infuses life and dynamism into a static image. Is the person “standing still,” “walking briskly down a sidewalk,” or “looking thoughtfully out a window”? An action provides narrative context and prevents the subject from appearing stiff or unnaturally posed.
3. Environment: Where is the subject located? The environment sets the mood, context, and overall atmosphere of the image. A “pristine white studio background” creates a clean, commercial look, while a “dense, misty forest at dawn” evokes a sense of mystery and nature. Be specific about the setting to control the story your image tells.
4. Style: This defines the aesthetic or artistic treatment of the image. Are you aiming for “hyperrealistic photography,” a “minimalist vector graphic,” “cinematic lighting,” or a “hand-drawn charcoal sketch”? The style instruction tells the model *how* to render the image, guiding its choice of texture, color palette, and overall composition.
5. Lighting: Arguably the most critical component for realism, lighting determines the mood, dimension, and believability of an image. Where is the light coming from? Is it “soft, diffused natural light from a large window on the left,” “hard, dramatic directional light from directly above,” or the “warm, gentle glow of golden hour”? Specifying the light source and quality is often the deciding factor between an amateurish render and a professional-looking photograph.
6. Details: These are the small but crucial elements that elevate an image from good to great. Modifiers like “shallow depth of field,” “sharp focus on the eyes,” “visible fabric texture,” or “subtle lens flare” add layers of professional polish. These details guide the AI’s “camera” and post-processing decisions, creating a finished product that feels intentional and refined.
Consider the difference. A weak prompt is “portrait of a woman.” A powerful, six-component prompt is: “Photorealistic portrait of a 28-year-old woman with curly black hair (Subject), sitting in a chair and looking directly at the camera (Action), inside a sunlit minimalist room (Environment). The scene is illuminated by soft natural light from a window on the left (Lighting), creating a shallow depth of field with sharp focus on her eyes (Details). The overall aesthetic should mimic a shot from a Canon 85mm lens (Style).” The second prompt leaves nothing to chance.
Applying the Formula: Portrait and Product Photography Techniques
Let’s put this six-component formula into practice. For portrait photography, the goal is to create a believable human moment. This requires nailing three key aspects: authentic eye contact, naturalistic lighting, and tangible textural details. For a professional headshot suitable for a corporate website or LinkedIn profile, you need a clean, focused image that conveys competence and approachability.
Professional Headshots
A successful prompt isolates the subject and uses lighting to create dimension. The formula might look like this: “Studio headshot of a 45-year-old businessman in a navy suit and white shirt, smiling subtly. Neutral gray background. The main light source is a softbox from the upper left, creating soft shadows. Photorealistic style with sharp focus on the face and a shallow depth of field.” The result is an image where the eyes are sharp, the lighting is flattering without being harsh, and the blurred background keeps the viewer’s attention locked on the subject’s expression. Specifying “sharp focus on the face” is crucial; without it, the AI might render the entire image in sharp focus, creating an unnatural, flat appearance that undermines the portrait’s professional quality.
E-commerce Product Shots
For product photography, the primary objective is to eliminate buyer doubt. The customer must be able to see the product with absolute clarity, understanding its form, texture, and features without any distractions. The key is pristine isolation and lighting that reveals detail without creating harsh reflections or shadows.
Here is a formula for a typical e-commerce product: “High-detail product photograph of a modern black gaming controller, centered on a pure white seamless background. The scene is lit with soft, diffused studio lighting from directly above. No shadows. Photorealistic style, with sharp focus on the visible texture of the matte plastic and rubber grips.” This prompt instructs the AI to create an image ready for a Shopify or Amazon listing. The “no shadows” command is essential for achieving that clean, floating-on-white look standard in e-commerce. Without it, the AI often adds a subtle drop shadow that can make the photo look amateurish. For a full product gallery, you can simply keep the prompt identical and swap out the composition detail, changing “centered composition” to “3/4 view from the left” or “top-down view.”
Advanced Visuals: Architecture and Landscape Generation Strategies
The same six-component formula extends seamlessly to more complex scenes like architectural interiors and sweeping landscapes. The key is providing the AI with clear structural and atmospheric information.
Architectural Rendering
When generating interior design concepts or real estate visuals, you need to convince the viewer that the space is real. This hinges on realistic geometry, believable materials, and, most importantly, accurate lighting. A strong architectural prompt defines the light source with precision. For example: “Wide-angle photograph of a modern minimalist living room with floor-to-ceiling windows. Natural sunlight is streaming in from the right side. The room features a gray fabric sofa, a light oak wood coffee table, and light oak flooring. The lighting should create soft, realistic shadows. Photorealistic and clean.” This prompt works because it establishes a clear light source and direction (“sunlight streaming in from the right”), which allows the AI to render accurate shadows under furniture. It also specifies materials (“light oak,” “gray fabric”), giving the model textural information to render realistically. If you omit the light direction, you often get flat, ambient lighting that immediately kills the sense of realism.
Landscape Photography
Generating compelling AI landscapes is about creating depth and mood. This is achieved by thinking in layers and specifying atmospheric conditions. A powerful landscape prompt forces the model to construct a scene with a foreground, midground, and background. Here is an example: “Epic wide-angle landscape photograph of the Swiss Alps at sunrise. In the foreground, a calm, clear blue lake shows perfect reflections of the mountains. The midground features a dense pine forest. In the background are sharp, snow-capped mountain peaks. There is a light mist rising from the forest. Bathed in soft golden hour light. Highly detailed and photorealistic.” This prompt creates a scene with distinct layers, drawing the viewer’s eye through the composition. The “light mist” and “soft golden hour light” add atmosphere and mood, making it feel like a specific moment in time rather than a generic mountain scene. The detail about “perfect reflections” is vital; without it, AI-generated water can often look muddy or unrealistic, breaking the illusion.
Enhancing Realism and Troubleshooting Common Issues
Beyond basic generation, mastering AI image creation involves understanding how to capture authenticity and troubleshoot the inevitable imperfections. For genres like street photography, the goal is to create a candid moment that feels unstaged. This means using prompts that introduce movement and imperfection. A prompt like, “Candid street style photo of a woman in a red coat walking, looking to the side. Busy urban street with blurred pedestrians in the background. Overcast natural light. Shot on a 50mm lens, slightly grainy film look,” works because it avoids the stiff, camera-aware pose that screams “AI.” The “grainy film look” is a powerful technique for adding authenticity and subtly masking minor digital artifacts.
When generating group photos, the primary challenge is ensuring every face is sharp, distinct, and natural. A prompt should include commands like “all faces in sharp focus,” “evenly lit from the front,” and “natural, varied expressions.” To combat the AI’s tendency to create similar-looking faces, add “diverse facial features and realistic skin tones.” If one face in a group shot is distorted, it’s often more efficient to regenerate the image than to try and edit it.
One of the most significant breakthroughs is the ability to generate legible text within images. For simple infographics or titles, use prompts that prioritize clarity: “Minimalist infographic with the bold sans-serif title ‘5 Steps to Success’. Black text on a white background. High contrast and sharp, legible text.” While short phrases and titles work well, the technology still struggles with long paragraphs or complex layouts. For more involved designs, the best workflow is to generate the base visual and layout using AI, then add and refine the text in a dedicated design tool.
Finally, the image editing capabilities offer tremendous power. You can upload an existing photo and make targeted changes. The key is to tell the AI what to preserve and what to alter. For example, to change a background, you would upload a photo and use a prompt like, “Keep the subject (a man in a blue shirt) exactly as is. Replace the park background with a sandy beach at sunset. The lighting on the subject should be adjusted to be warm and golden to match the new sunset background.” This last instruction, “match the lighting,” is critical. It forces the model to blend the subject and the new background realistically, preventing the cut-and-paste look that occurs when light sources are mismatched.